
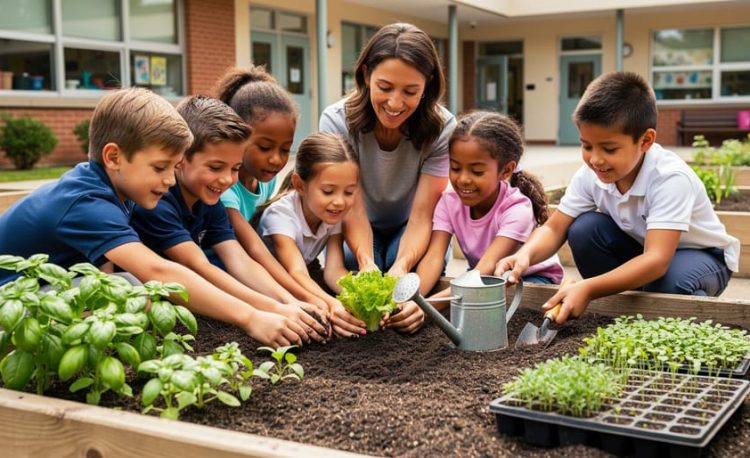
Creating a school garden that transforms how children eat is a hands-on project requiring six to eight weeks of planning, a weekend of installation, and consistent participation from students, staff, and volunteers. The process works because children who grow vegetables are far more willing to try them, turning curious gardeners into enthusiastic eaters of produce they might otherwise refuse.
School gardens succeed when they’re designed with both education and nutrition in mind. A well-planned garden provides fresh vegetables for cafeteria meals, creates outdoor classroom space for science and math lessons, and gives students ownership over their food choices. The key is starting small with easy-to-grow crops like lettuce, tomatoes, and herbs, then expanding as your community builds confidence and momentum.
You’ll need approval from school administrators, a sunny location with water access, basic gardening supplies, and a core team willing to coordinate planting schedules and maintenance. The garden doesn’t need to be elaborate. Even a few raised beds can produce enough harvest to make a visible difference in what students choose to eat.
This guide walks you through every stage, from forming your planning committee and securing funding to installing beds, choosing crops that match your school calendar, and maintaining the garden through summer breaks. You’ll learn which safety measures protect young gardeners, how to structure student participation so the workload stays manageable, and practical strategies for keeping the garden thriving year after year.
Schools across the country have proven that garden programs shift eating habits when students connect growing food with eating it. With clear planning and community support, your school can create the same transformation.
Why School Gardens Make a Difference for Children’s Health
When children plant seeds, water seedlings, and watch vegetables grow over weeks, something remarkable happens: they develop a personal connection to food that changes their eating choices. School gardens create this transformation because kids become invested in the plants they’ve tended, leading to more willingness to taste vegetables they might otherwise refuse. A child who won’t touch carrots at the cafeteria will often try one they pulled from the garden themselves.
This shift happens because gardens make abstract nutrition lessons concrete. Instead of simply hearing that vegetables are healthy, students experience the full cycle: they see how plants need nutrients to grow strong, just like their own bodies. They learn that food doesn’t begin in packages but comes from soil, sun, and water. This hands-on approach creates lasting understanding that goes far beyond what traditional classroom lessons alone can achieve, reinforcing the health education impact schools are working to deliver.
Beyond nutrition, school gardens build life skills that benefit children across subjects and situations. Students practice patience waiting for harvests, learn responsibility through consistent watering schedules, develop problem-solving when facing challenges like pests or weather, and work collaboratively on shared garden tasks. These competencies extend well beyond the garden fence, supporting academic growth and personal development in ways that complement healthy eating outcomes.
What You Need Before You Start: Planning Tools and Materials
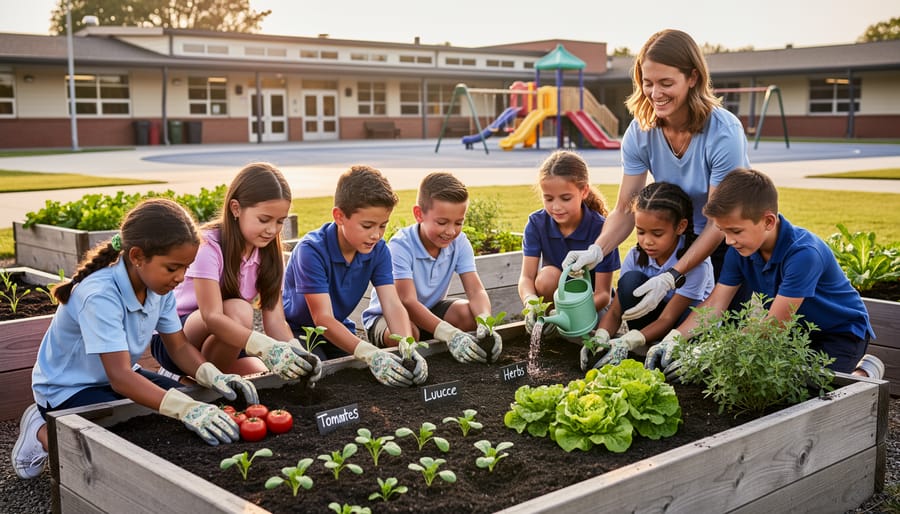
Starting a school garden takes more planning than enthusiasm alone, but you don’t need a massive budget or expert knowledge to succeed. What you do need is a clear picture of your site, a small team of committed helpers, and a realistic list of supplies that won’t overwhelm your first season.
The most important first step is forming a garden committee. You want a mix of perspectives: a teacher or two who can connect the garden to classroom learning, a parent volunteer coordinator, someone with gardening experience (even a hobbyist works fine), and if possible, a maintenance staff member who understands your school’s water systems and site limitations. Three to five active people beat a committee of twenty who rarely show up. Meet monthly during planning, then adjust as you build momentum.
Next, walk your campus to choose a garden site. You need at least six hours of direct sunlight daily for vegetables to thrive. Check that water access is realistic, a nearby spigot or hose connection saves enormous hassle. Pick a spot visible from classrooms or common areas so students see the garden regularly and feel ownership. Avoid low-lying areas where water pools after rain, and steer clear of spots too close to ball fields where stray soccer balls become a weekly problem.
Decide whether you’ll use raised beds or plant directly in the ground. Raised beds cost more upfront but offer better drainage, clearer boundaries, and easier access for young children. In-ground plots work if your soil drains well and you’re willing to amend it. For a first garden, two or three four-by-eight-foot raised beds give you enough space to grow a meaningful harvest without overwhelming your volunteers.
Gather your basic supplies with an eye toward starting small:
– Committee members: teachers, parent volunteers, community gardeners, maintenance staff
– Site checklist: six-plus hours of sun, water source within hose reach, visibility, good drainage
– Garden setup: raised bed lumber or in-ground plot space, quality soil or compost, mulch
– Tools: child-safe hand trowels, watering cans or a hose with gentle nozzle, garden gloves in kid sizes
– Seeds and plants: fast-growing vegetables like lettuce and beans, herbs, starter transplants for tomatoes
– Optional but helpful: low fencing to mark boundaries, labels for plant identification, a small storage bin for tools
Look for donations before you buy. Local garden centers often contribute soil or seeds for school projects, and parent networks can supply gently used tools. Hardware stores sometimes discount lumber for raised beds when you explain the educational purpose.
Start with one manageable plot this year. You can always expand next season once you understand your site’s quirks and your volunteer capacity. A small, thriving garden beats an ambitious plan that falls apart by October.
Safety Considerations and Garden Rules
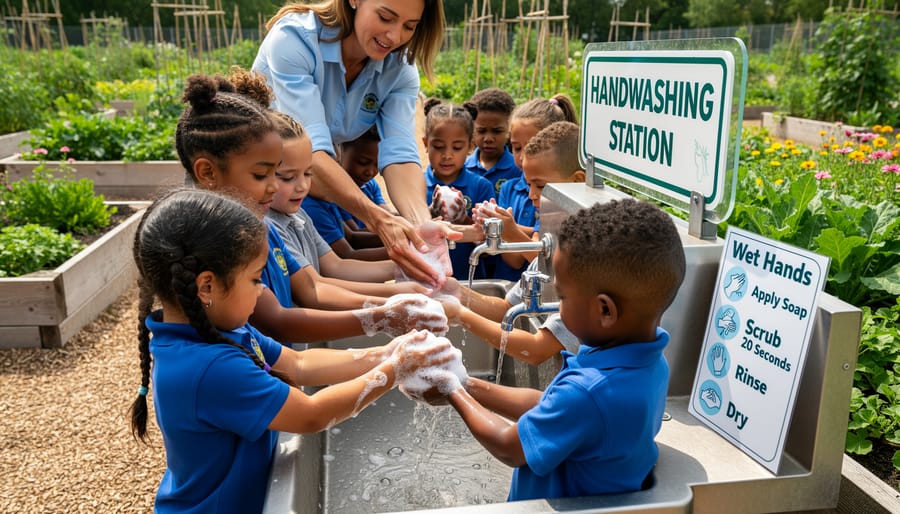
A safe garden is a successful garden. Before you break ground, establish clear safety protocols that protect children while they learn.
Adult supervision is non-negotiable. Plan for at least one adult per eight to ten children during garden activities. Teachers, parent volunteers, or garden coordinators should be present whenever students handle tools, water plants, or work in garden beds.
Tool safety starts with age-appropriate equipment. Younger students should use child-sized trowels and hand rakes, not full-size shovels or pruners. Demonstrate proper handling before every session: how to carry tools safely, where to set them down, and how to pass them to others. Store tools in a locked shed when not in use.
Identifying hazards protects everyone. Walk your garden site before planting and remove any poisonous plants common to school grounds (oleander, foxglove, castor bean, daffodil bulbs). Post clear signs showing which plants are safe to touch and taste. Teach students the golden rule: never eat anything without adult permission.
Sun protection matters during extended outdoor sessions. Schedule garden time before 10 AM or after 3 PM when possible. Remind families to send hats and apply sunscreen. Keep drinking water accessible and encourage frequent breaks in shade.
Allergy awareness supports student wellness learning. Survey families about bee sting allergies, pollen sensitivities, and plant reactions before garden activities begin. Keep an emergency action plan posted and ensure staff know who has EpiPens or inhalers.
Establish garden behavior expectations from day one: walk, don’t run; keep hands away from faces until washed; respect all living things; follow adult instructions immediately. Review these rules at the start of every session until they become routine.
Step-by-Step: Building Your School Garden
Step 1: Prepare Your Garden Site
Start by marking the garden boundaries with stakes and string so everyone can see the work zone. If you’re building raised beds, this is the time to assemble them, basic wooden frames work well and let students help with measuring and fitting pieces together under supervision.
For in-ground gardens, clear grass, weeds, and debris from the planting area. Students can safely pull weeds by hand (have them wear gloves) and collect rocks in buckets. Save the heavier digging and turning of soil for adult volunteers. If your site has compacted or poor soil, mixing in compost improves drainage and adds nutrients. Many garden supply stores or local farms donate or discount compost for school projects.
Testing your soil helps you understand what it needs. Simple home test kits show pH and basic nutrient levels, or contact your county extension office, many provide free or low-cost testing. Share the results with students as a real-world science lesson about what plants need to thrive.
Fill raised beds with a blend of topsoil and compost, letting students help shovel and spread the mix. They’ll feel ownership from the start, and you’ll have a ready-to-plant garden within a weekend. Keep the first garden small, one or two beds, so preparation feels manageable rather than overwhelming.
Step 2: Choose Kid-Friendly Plants
Choose plants that grow fast and forgive beginner mistakes. Children get excited when they see results quickly, so stick with vegetables and herbs that sprout within days and produce something edible in weeks, not months.
Lettuce and radishes top the list for speed, both can go from seed to harvest in about a month. Cherry tomatoes give kids something sweet to pick and eat right in the garden. Snap peas and green beans are easy to spot when they’re ready, and most children will happily munch them raw. Carrots add the thrill of pulling something hidden from the soil.
Herbs like basil, mint, and parsley grow reliably and smell wonderful when students brush past them. Sunflowers aren’t edible but make dramatic, kid-friendly landmarks that attract pollinators.
Check your local growing season before you buy seeds. Cool-season crops like lettuce and peas work best for spring and fall planting in most climates, while tomatoes and beans need warm soil. Ask your local garden center or cooperative extension which varieties thrive in your area, they’ll steer you toward plants suited to your specific conditions.
Avoid anything that requires complex pruning, frequent pest management, or months of waiting. Save your enthusiasm for varieties labeled “easy,” “beginner-friendly,” or “quick-growing.” Your goal is plants that cooperate while children learn.
Step 3: Plant with Student Involvement
Turn planting day into a hands-on learning event. Schedule it when the weather’s mild and you’ll have time to work slowly. Divide students into small groups (four to six kids per adult) so everyone gets dirty without chaos.
Show students how to plant before they start. Demonstrate proper spacing, most seedlings need about six inches apart, though your seed packets will tell you exactly. Teach them to dig holes about twice as deep as the seedling container, gently loosen roots, and firm the soil around each plant. Let them water their own sections with small watering cans or cups so they connect to the care process.
Give each class or grade level its own garden bed or clearly marked section. Label it with their names or classroom number. When kids know “that’s our tomato plant,” they’ll check on it during recess and feel proud of what they’ve grown. Rotate the planting roles each time: some students dig, others plant, others water. That way everyone learns every skill and stays engaged rather than standing around watching.
Step 4: Set Up a Maintenance Schedule
A garden only thrives when someone tends it regularly. Build a simple maintenance calendar that assigns weekly tasks, watering, weeding, pest checks, to specific classes or grade levels. Monday’s class waters and inspects plants, Wednesday’s class weeds, Friday’s class harvests ripe produce. Rotate these responsibilities monthly so every group gets hands-on experience with all tasks.
Post the schedule visibly near the garden and share digital copies with teachers. Include what to look for during each check: wilting leaves signal thirst, yellow spots might mean pests, crowded seedlings need thinning. Give each class a garden journal to record what they did and what they noticed.
Summer and holiday breaks require advance planning. Recruit parent volunteers to water twice weekly during vacation weeks. Partner with summer programs or after-school clubs that can adopt the garden as a project. Community garden members or nearby residents sometimes volunteer for drop-in care. Install simple drip irrigation or self-watering systems for beds if your budget allows, reducing how often someone needs to visit. Before long breaks, mulch heavily to retain moisture and slow weed growth. Clarify who holds the key and how volunteers access the space safely.
Step 5: Harvest and Use Your Produce
Harvest time is your biggest teaching moment, and the best way to prove to kids that fresh food tastes great. Show students how to check if vegetables are ready: tomatoes should be firm and fully colored, lettuce leaves big enough to fill a hand, carrots with visible shoulders poking through soil. Let them pick their own produce and handle it gently.
The real magic happens when kids eat what they grew. Arrange a garden-to-table tasting right in the classroom, where students wash and sample their harvest together. If your cafeteria is willing, donate produce for lunch service so the whole school sees garden vegetables on trays. Many schools send bags of fresh herbs or cherry tomatoes home with students, turning one harvest into dozens of family conversations about healthy food.
Make harvest a celebration, not just a chore. Take photos of proud students holding their vegetables, announce harvest days over morning announcements, and tie the experience directly to nutrition lessons. When children see the journey from seed to plate, they understand that vegetables aren’t mysterious, they’re food they created themselves.
How to Know Your Garden Is Working: Signs of Success
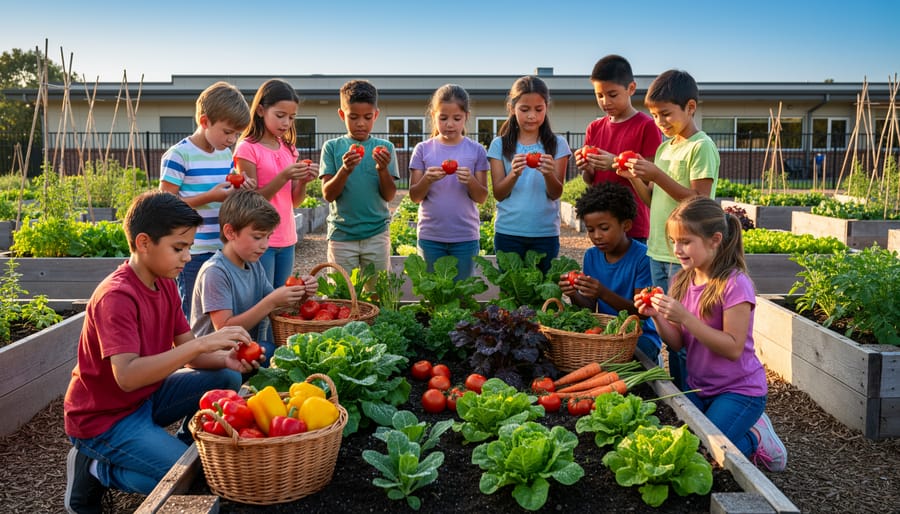
You’ll know your garden is working when you see real changes in how students interact with food. Watch for kids asking when they can visit the garden, volunteering for watering duty, or excitedly pointing out plants they helped grow. In the classroom, teachers often notice more questions about vegetables, cooking, and where food comes from, curiosity that extends into discussions about future health habits.
The most telling sign is behavioral: children trying vegetables they grew themselves. You might see students who previously refused tomatoes now eating them straight from the vine, or kids trading garden stories at lunch while sampling salad bar items. Parents frequently report that children ask for specific produce at the grocery store or request help planting gardens at home.
Gather feedback through simple methods. Ask teachers to share observations during staff meetings. Send brief surveys to families asking if children mention the garden or request new foods. Talk casually with cafeteria staff about whether students choose more vegetables on garden harvest days.
As success builds, consider expanding your impact. Add garden time to science or math lessons, measuring plant growth, tracking harvest quantities, calculating recipe yields. Partner with local nurseries for plant donations, master gardeners for expert advice, or community groups for volunteer support. Apply for small grants through parent-teacher organizations or local businesses.
Start a garden club for interested students, create a composting system, or build connections with nearby farms. Each step strengthens the garden’s role in your school community and deepens its influence on how children think about food, making the investment sustainable for years to come.
Real Stories: Schools Making Gardens Work
At Riverside Elementary, a third-grade teacher started small. She brought in six large containers, filled them with potting soil, and let her students plant cherry tomatoes and snap peas. The kids named each plant, checked them every morning, and argued over whose turn it was to water. When the first tomatoes ripened, children who normally refused vegetables fought over who got to try them. Other teachers noticed. By the next spring, Riverside had built four raised beds near the playground, and every grade rotated garden duty. Parents volunteered to water over summer break. The garden wasn’t perfect, rabbits ate half the lettuce one year, and a dry spell killed the cucumbers another, but it became part of the school’s identity. Teachers started connecting garden activities to science lessons and writing prompts. Students who struggled in traditional classroom settings found confidence in the garden, and families began asking for recipes to use the produce their kids brought home.
Roosevelt Middle took a different path. A group of seventh graders proposed a school garden as a service-learning project. They researched designs, wrote grant applications, and pitched their plan to the school board. The administration agreed to provide space and water access if students managed the work. That first summer, a core group of students and parent volunteers built the beds and planted fall crops. The students created a garden club, recruited younger members, and organized harvest days where families picked vegetables together. Teachers noticed that kids involved in the garden showed up early to check plants before class. The garden became a gathering spot, and students took pride in contributing produce to the cafeteria. When challenges arose, weeds overtaking beds or scheduling conflicts, the students problem-solved together, building leadership skills that extended beyond the garden fence.
Common Questions About School Gardens
School gardens raise understandable questions about logistics, resources, and feasibility. Here are clear answers to the concerns educators and parents most often bring up.
What if we don’t have much outdoor space?
Container gardens, vertical planters, and raised beds work well in small areas like patios or along building walls. Even a few large pots can grow enough lettuce, herbs, and cherry tomatoes to give students meaningful hands-on experience with growing food.
How do we fund a school garden?
Start by approaching parent-teacher organizations, local garden centers for donated supplies, and community service groups that support youth programs. Many schools cover initial costs through small grants from health foundations or environmental education funds, then maintain gardens inexpensively once established.
What happens to the garden during summer break?
Recruit parent volunteers for weekly watering rotations, partner with summer programs that use your school, or plant drought-tolerant perennials and cover crops that require minimal care. Some schools hold community harvest events before break and restart planting in fall.
How do we get teachers on board?
Connect garden activities to existing curriculum so teachers see gardens as teaching tools rather than extra work. Offer to lead initial garden sessions yourself, provide lesson plans that meet educational standards, and emphasize that gardens enhance school nutrition education already happening in classrooms.
Time commitment varies by garden size, but most school gardens need 15 to 30 minutes of attention three times per week during growing season. Rotating responsibilities among classes spreads the work and keeps students engaged without overwhelming any single teacher.
Gardens adapt to nearly any climate when you choose regionally appropriate plants and adjust your growing calendar. Cold-climate schools focus on spring and fall cool-season crops, while warm regions can garden year-round with shade structures and drought-resistant varieties. Your local agricultural extension office provides free guidance on what grows best in your area and when to plant it.
You don’t need a perfect plot or a hefty budget to start making a difference. Even a few containers on a sunny windowsill or a single raised bed can spark curiosity and change how children think about food. The goal isn’t a showcase garden, it’s creating moments where kids connect what they grow with what they eat.
Every small step counts. When a child picks a cherry tomato they planted, washes it, and takes that first bite, something shifts. They’re not just learning about vegetables; they’re building confidence and curiosity that shapes why health matters throughout their lives. These hands-on experiences stick with them far longer than any nutrition poster.
Start where you are. Gather a few interested parents or teachers, choose one easy-to-grow crop, and celebrate every harvest, no matter how small. Your garden doesn’t need to transform the entire school overnight. It just needs to give kids a reason to get their hands dirty, watch something grow, and discover that healthy food can be exciting. That’s where lasting change begins.